Saturday, October 13, 2012
Project 12: Fabric Flowers
Dear Martha:
As I am sure you can tell from the picture above, your fabric flowers left me... frustrated.
I have not done a project for this blog since, um, March 6, 2011 (sorry followers!) so you can imagine my dismay when I tried to resume my martha crafting and your martha flowers were just short of impossible to make.
So here is some advice that I have for you on things to double check before publishing a chapter on fabric flowers:
1. That liquid starch is readily available. I went to my local grocery store and tried first with spray starch because it was all they had. This was an epic failure. It did not make the fabric stiff enough so it just ended up getting stuck in the punch. I decided to accept this as my own mistake and went looking for some liquid starch. Finding it only at the FOURTH store!! (Followers: see the picture below for the fabric I planned on using for the flowers - an old shirt, an old sheet my old dog chewed a hole in, and the sheet bag my new sheets came in - making it a great "upcycle" project.)
2. Martha - this is the most important advice: MAKE SURE THE PUNCHES CAN ACTUALLY PUNCH THE FABRIC! I had two different punches and even after dipping the fabric in liquid starch, and making it as stiff as a board, the punches failed to cut through the fabric. Even the fabric of that very thin white shirt. So the fabric got stuck AGAIN. Then when I pushed harder the punches just made indents. Only after several tries and the force of all my muscle did I get a few measly flowers. It was too unrealistic to punch out as many flowers as I would need to make the "blooming branches" project. (thirty or more flowers cut out and glued to branches from outside). So I ended up just making one small card out of a combination of fabric and paper flowers.
3. Nobody has ever heard of flower "pips" not even the helpful lady at Michael's. Do you mean flower "picks"?
And so Martha, as much as it pains me to say this, fabric flowers is just not one of your best crafting projects. I wonder how you made them look so beautiful in your book when they were nearly impossible to make.
Sadly,
Your Friend Ellie
ps. A shout out to my mom who inspired me to set time aside as a new mom to continue with this blog and who helped me with this project.
Sunday, January 22, 2012
Me + Baby = New Rules


To those of you who were starting to lose faith...I'm back. Sort-of.
Introducing my latest and greatest project, my baby girl. So now you know why I have been absent. Starting in March of 2011 I was busy sleeping, being nauseous, and creating a baby. I was also busy doing non-Martha related projects such as crocheting a baby blanket and painting a nursery. Since November of 2011 I have been busy learning how to be a mom. This is no easy task and does not come with step by step instructions in one of Martha's books. Thankfully. (No offense Martha but you have been to prison).
Now that I am a mom I have to rethink this blog. The next project in Martha's book is glass etching. This project involves chemicals. Chemicals that I am just not comfortable using around my baby girl. The etching cream needed comes with this warning:
"Danger, may be fatal or cause permanent damage to skin, eyes or respiratory tract. Vapors harmful. Causes severe burns which may not be immediately painful or visible. Ages 18 and over."
So even though I am 18 and over I just don't want to take the risk. Even with gloves, long sleeves and my baby safely tucked in my husband's arms in another room, I just can't do it. Not for some frosted glass.
So please stay tuned for my next project: fabric flowers. But please don't hold your breath, I do have a newborn after all.
Sunday, March 6, 2011
PROJECT 11: Decoupage
I think decoupage is my favorite project so far. I like being able to do art on a bigger scale. I started with this cabinet:

As you can see I wasn't too sure about this undertaking. First of all, although the cabinet is a mess (this picture doesn't show all the stains) it is a sturdy and useful cabinet that I was afraid of ruining. The cabinet also has a history. My college roommate and I bought it together our sophomore year because we had rushed into renting an awful, dirty, apartment, hasty as we were because we were afraid this lovely almost-crack den might be swept up if we didn't act fast. We ended up needing the cabinet because the kitchen was the size of a closet and we had no counter or cabinet space. So I sat down with a screw driver and put the entire thing together and was very proud of myself for being able to do it. I think I was doing that while my roommate was plucking out the mushrooms that were growing out of the bathroom floor. And I am not joking about the mushrooms.
Then the cabinet made its way out to Denver where it has been a tv stand, a stand for a fish tank and finally a cabinet stuffed in a closet for all the things we should have probably just gotten rid of because we couldn't really access any of it anyway. Well now that I am a master gardener, I need a cute cabinet for my pots and potting soil that I can put on our back porch. I thought this wonderfully accommodating cabinet might do the trick.
So after emptying out the cabinet of phone books and batteries, I found some scrap book paper that I bought from Target awhile ago. The only thing I had to buy for this project was Mod Podge so that was a plus. Then I had a great time mapping out a pattern, I enjoy the measuring and the planning. I would highly recommend laying it all out before actually gluing the paper to the furniture as seeing it laid out may give you ideas on what might look better.
Throughout the process of adhering the paper to the cabinet I was at once nervous and excited. I was sure I was going to make a mistake but I also became entrenched in the project. I love those kinds of therapeutic projects where you don't think of anything else, your attention totally focused. I got so carried away that I imagined myself a sculpture artist working in my barn while wearing a flannel shirt and having big unruly curly hair, when in fact, I was actually working in my pajamas in my laundry room with very straight hair to glue paper to a wood cabinet. I suppose one can dream.
The only problems I encountered were with bubbles forming once I laid the paper on the cabinet. Ms. Stewart suggests using a brayer to even out the paper and get rid of these bubbles but I found that a brayer only made it worse. In fact the first drawer I did has terrible bubbling and I attribute it to the brayer. So instead I just tried to be very careful to lay the paper down evenly.
So now I have a gardening cabinet I can proudly display on my porch. This is the final product:


As you can see I wasn't too sure about this undertaking. First of all, although the cabinet is a mess (this picture doesn't show all the stains) it is a sturdy and useful cabinet that I was afraid of ruining. The cabinet also has a history. My college roommate and I bought it together our sophomore year because we had rushed into renting an awful, dirty, apartment, hasty as we were because we were afraid this lovely almost-crack den might be swept up if we didn't act fast. We ended up needing the cabinet because the kitchen was the size of a closet and we had no counter or cabinet space. So I sat down with a screw driver and put the entire thing together and was very proud of myself for being able to do it. I think I was doing that while my roommate was plucking out the mushrooms that were growing out of the bathroom floor. And I am not joking about the mushrooms.
Then the cabinet made its way out to Denver where it has been a tv stand, a stand for a fish tank and finally a cabinet stuffed in a closet for all the things we should have probably just gotten rid of because we couldn't really access any of it anyway. Well now that I am a master gardener, I need a cute cabinet for my pots and potting soil that I can put on our back porch. I thought this wonderfully accommodating cabinet might do the trick.
So after emptying out the cabinet of phone books and batteries, I found some scrap book paper that I bought from Target awhile ago. The only thing I had to buy for this project was Mod Podge so that was a plus. Then I had a great time mapping out a pattern, I enjoy the measuring and the planning. I would highly recommend laying it all out before actually gluing the paper to the furniture as seeing it laid out may give you ideas on what might look better.
Throughout the process of adhering the paper to the cabinet I was at once nervous and excited. I was sure I was going to make a mistake but I also became entrenched in the project. I love those kinds of therapeutic projects where you don't think of anything else, your attention totally focused. I got so carried away that I imagined myself a sculpture artist working in my barn while wearing a flannel shirt and having big unruly curly hair, when in fact, I was actually working in my pajamas in my laundry room with very straight hair to glue paper to a wood cabinet. I suppose one can dream.
The only problems I encountered were with bubbles forming once I laid the paper on the cabinet. Ms. Stewart suggests using a brayer to even out the paper and get rid of these bubbles but I found that a brayer only made it worse. In fact the first drawer I did has terrible bubbling and I attribute it to the brayer. So instead I just tried to be very careful to lay the paper down evenly.
So now I have a gardening cabinet I can proudly display on my porch. This is the final product:

Sunday, February 20, 2011
PROJECT 10: Clay

I do not like clay. I have never really liked clay. I feel like the things I make with clay are clumsy and unattractive. I suppose I have made a few token pieces that turned out okay (like the dragon I made in eighth grade) but usually I steer clear of this medium. My first attempt at this project were polymer beads designed to have a heart in the middle of them. I thought this would be an easy enough project but the clay was hard and crumbly even after kneading it. It may have been the brand of polymer clay (a generic sculpey) but I liked the colors more than what sculpey had to offer. So those turned out TERRIBLE. I am so embarrassed of them I cannot even bring myself to post a picture of them here.
So after a little pushing from my husband (I was ready to throw in the towel and just post something about my hatred for clay and its inability to cooperate with me) I decided to go with something a bit easier. Polka dot beads to string together to make bracelets for my nieces. These actually turned out pretty cute although the beads may be a little big for my nieces' tiny wrists. But the colors and designs are fun for girls their ages (three and four). They graciously modeled the bracelets for me and they stole the show! They are so cute anything they wear looks precious.


Thursday, December 30, 2010
PROJECT 9: Candle Making

For those of you who were certain I had abandoned my blog...doubt me no more...I was just taking a holiday break!
Actually, the craft of candle making could not have come at a better time. I needed gifts and these seemed like the perfect solution. Thus, I am just now publishing my post on candle making, as I waited to post so that the recipients would be surprised. I am happy to report that they were both surprised and pleased.
First of all, candle making is two things: 1.)messy and 2.) expensive! I had thought I would go to a craft store, find some beautiful natural beeswax and colorant and make inexpensive yet organic gifts. Unfortunately I was wrong. Natural beeswax was just out of my price range. For enough wax to maybe make one candle, it was $18 at Michaels! Now I understand why one small beeswax candle can run almost $20 at a boutique. So alas, instead of beeswax I bought a block of parafain wax and melted down one of my old plain white candles. (This worked fine but the candles did not have that natural, organic feel I was hoping for).
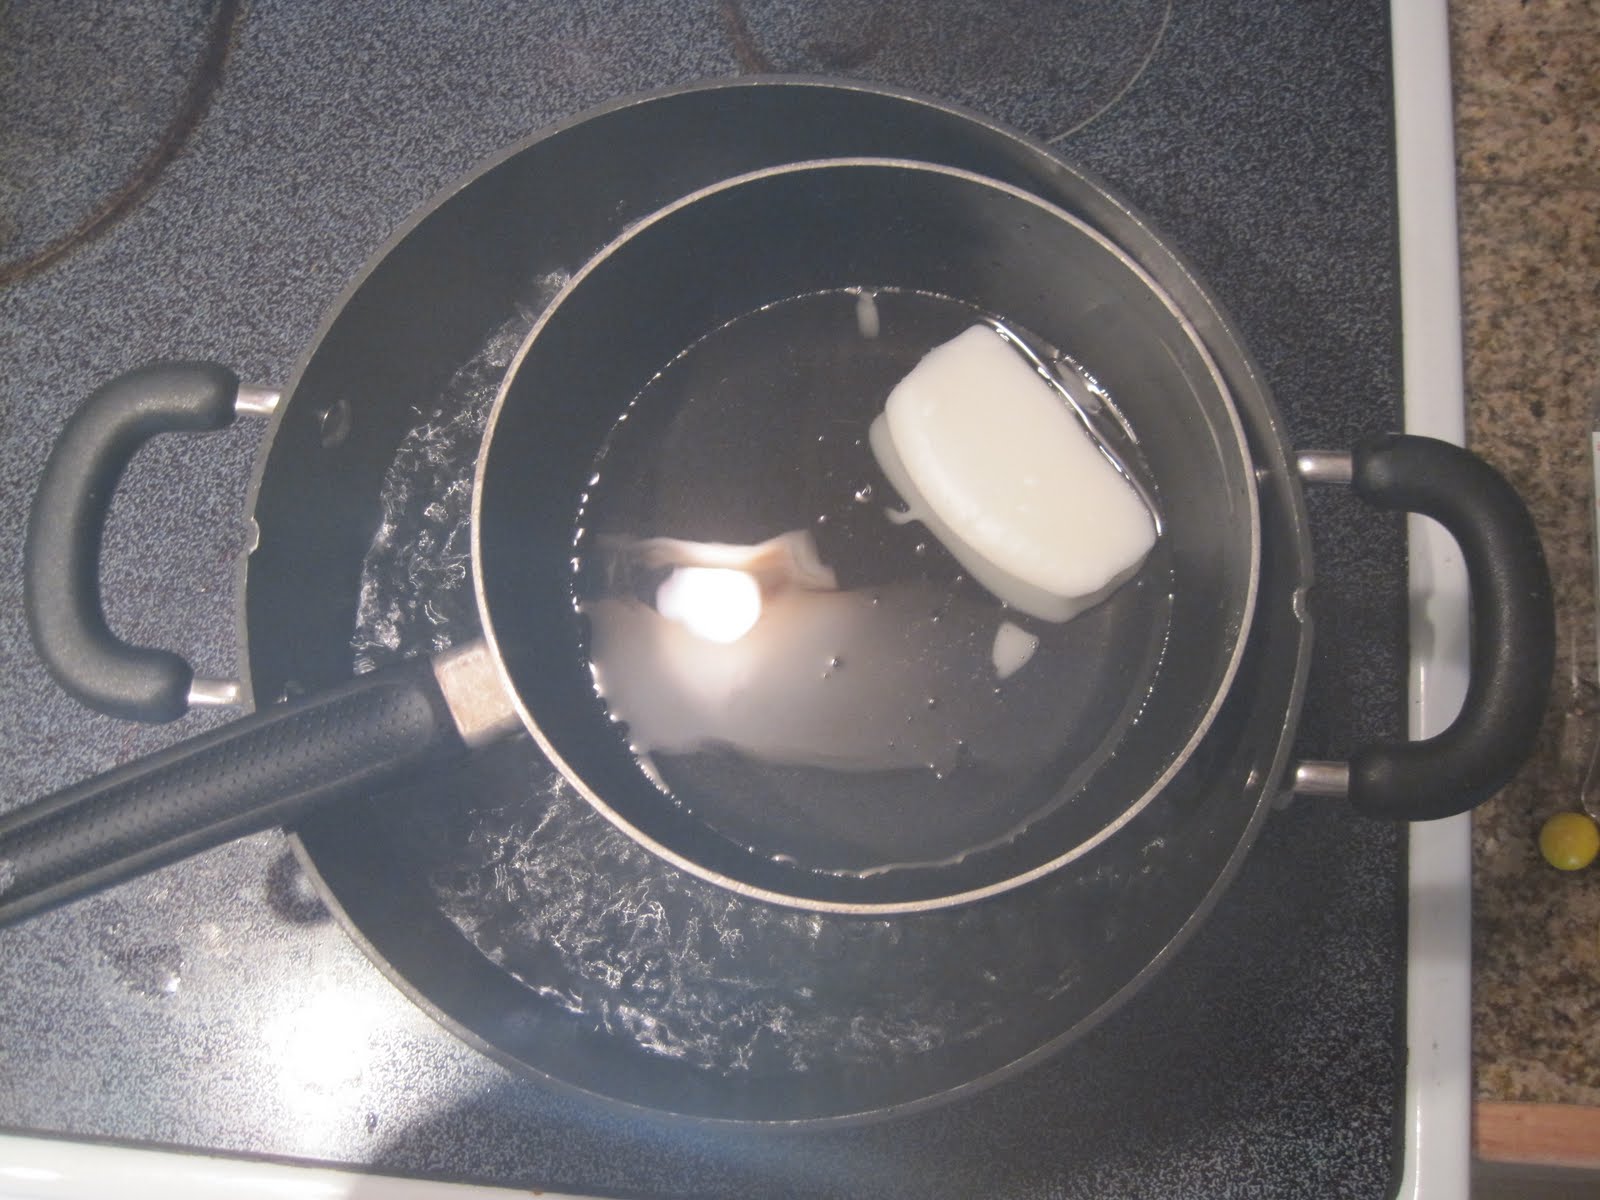
I covered my kitchen counter with newspaper and used an old pot to melt the wax down. You cannot put wax directly on a burner so I had another pot beneath it with boiling water. This worked great except that I ended up ruining the good bottom pot. Somehow bits of wax were sneaking their way from the top pot to the bottom pot and once wax melts in a pot its pretty much impossible to remove. So my poor pot was a casualty of this endeavor. (Not to mention a knife I needed to use to cut the wax before I melted it.)
I had planned on getting molds but again, those were too expensive. Instead I poured the wax into containers. I made four tea cup candles from tea cups I had that we never used and I used jars for the others. I also finally used those old candle holders I had laying around that I had burnt up the wax for a long time ago.
I chose not to use scents as the candles were gifts and I did not feel comftorable choosing a scent I didnt know would sit well with the person. (I think I am scarred from once getting my sister a vanilla scented present and having her nearly throw up from the smell). I did not use color for the tea cup candles as I thought white went well with the cup. I did use color with the jarred candles though, mixing colorant to make the exact color I was looking for.
The process was fun and rewarding as I was very pleased with the outcome. I do have to say however that if felt a little silly to melt wax only to pour it into a container and have it harden again.
So while the candles did not turn out as fancy or organic as I had hoped, I think they made perfect gifts. I followed Ms. Stewart's suggestion and wrapped match boxes in a pretty paper I had and that was just perfect for the finishing touch. I know the recipients are enjoying them too. In fact just today one of them called me to tell me that the candle had become her favorite because of how big the flame is...which could be good or bad I suppose...just be careful!
Tuesday, November 9, 2010
PROJECT 8: Calligraphy

Calligraphy: The art of producing decorative handwriting or lettering with a pen or a brush.
Since I was just a little girl I remember my mother doing calligraphy. The patience she had with each stroke of the pen was something I could never imagine myself having. The perfection with which she executed each letter was something I knew I could never achieve. This penchant for perfection is something that I have always adored and admired in my mother's art. Calligraphy, with the bends of the lines, the thickness of the stroke and the height of the letters, is an art form that can truly express the beauty of perfection. I lack the patience for such perfection and that is why I was truly grateful that my mother could help me with this project. She was visiting from Wisconsin last weekend and we worked on this project together. I felt so fortunate that she could be there to steady my hand and point out where I needed thicker lines or a different nib. A mother's expertise is an invaluable resource in a daughter's life.
I wanted to make gift tags for the gifts I will be giving out this holiday season so we bought gift tags at hobby lobby along with a snowflake stamp, a calligraphy pen complete with a set of nibs and ink. Once home I started practicing each lower case letter in Ms. Stewart's book. We quickly realized that my mother's calligraphy was different from the one I was practicing. My mom never does up strokes in her calligraphy, only down strokes. We tried to do it this way but it was apparent that Ms. Stewart's calligraphy required up strokes in order to complete many of the letters. My mother, who has taken numerous calligraphy classes told me that she had always been instructed that upstrokes were forbidden. However, we adapted and the letters turned out beautifully even with the upstrokes.
The part that was most difficult for me was switching between the thick and thin parts of the lines. Those subtle changes are really what makes calligraphy so stunning. I practiced over and over again but I think ultimately it came down to the nib I was using, I think it was letting out too much ink.
Eventually, after a lot of practicing and pointers from my mother I was ready to start making gift tags. I tried a couple with the snowflake stamp and did not like the look of them so I switched to another more regal looking stamp I had. I think calligraphy demands drama so the stamp I ended up using was perfect.

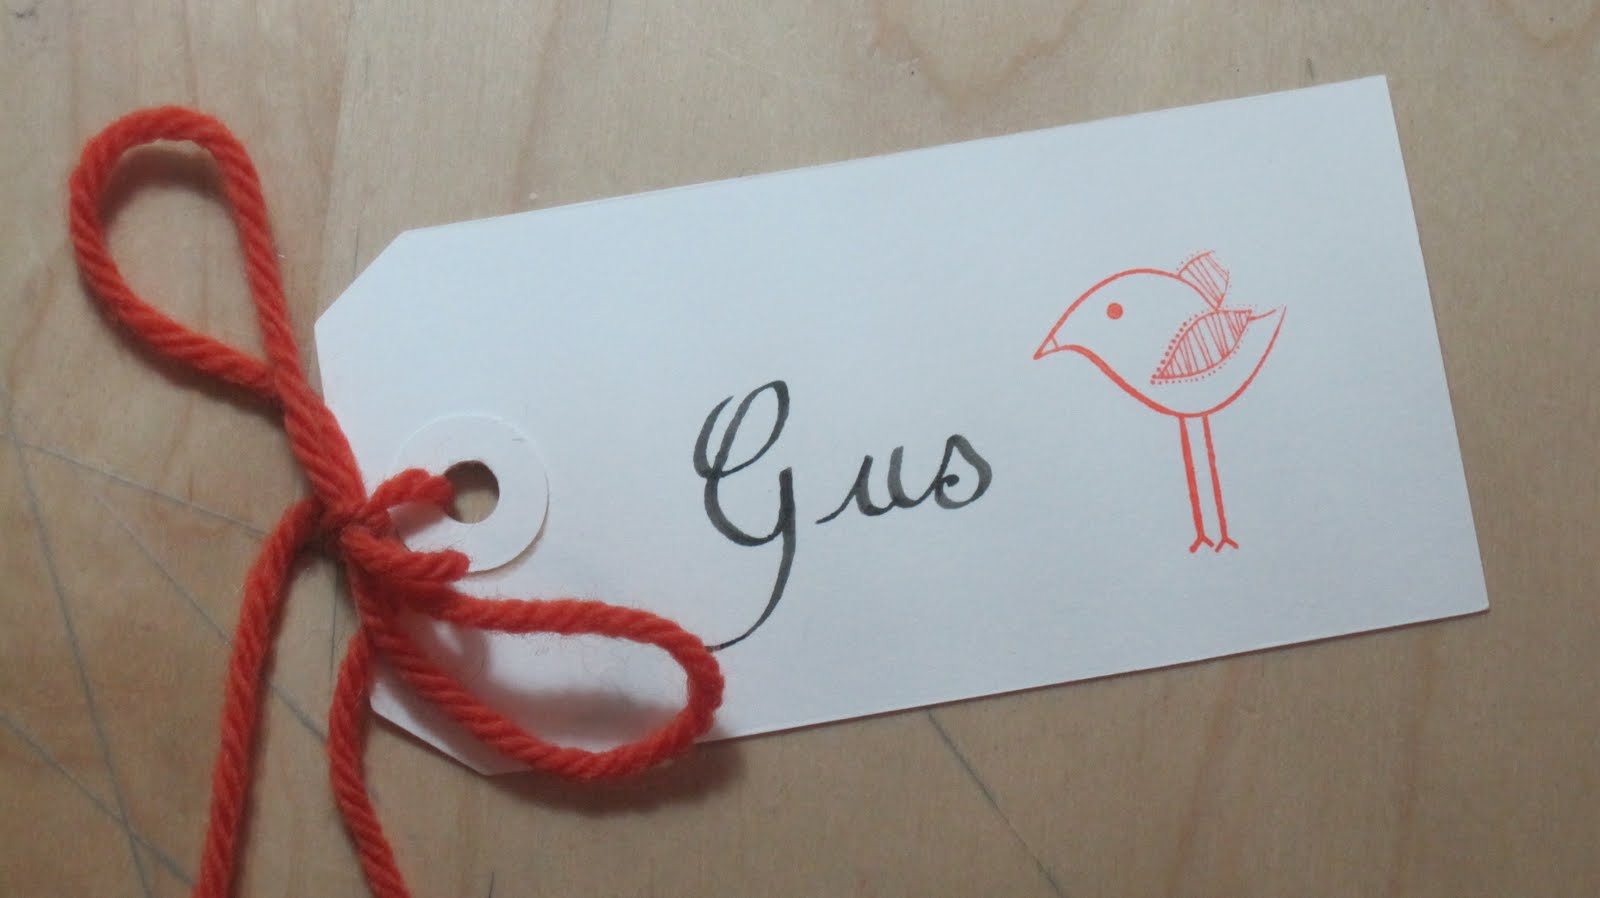
We also made a gift tag for my cousin's new baby Gus. I think it turned out so precious with the little bird stamp.
Thank you mom for contributing so much to this project and to me. Love you.
Thursday, October 14, 2010
Project 7: Botanical Printing: Botanical Rubbing

Well unfortunately most of the pictures I took for this entry were mysteriously missing from my camera when I went to upload them onto the computer so I apologize but this picture is all I have for the Botanical Rubbing craft. At Ms. Stewart's suggestion I made wrapping paper by doing leaf rubbings on tissue paper. It reminded me of my childhood as I did these rubbings with my mother and in art class. The wrapping paper turned out well but since it was tissue paper it was see through so when I went to wrap this gift I threw a darker blue tissue paper underneath. Its unfortunate that you will not be able to clearly see what the wrapping paper looks like because the other pictures are missing. (Although mom, and sister will be able to see it up close and in person as it is on its way to the birthday boy!)
I enjoyed the botanicals but I am very ready to move on (appropriate as we move into fall).
Sunday, October 3, 2010
PROJECT 6: Botanical Printing
At first I could not decide what I wanted to create using the botanical printing method. I thought maybe I could make a set of sheets but then I remembered that we have a king size bed and sheets are expensive and I did not want to risk making an ugly set of expensive sheets. The bed in the guest room is a full but already has enough sheets sets as it is. While flipping through the suggested pieces Ms. Stewart has in her book I came across the canvas bag. Perfect! I have reusable grocery bags but they have lately started to smell like mold and I have been meaning to replace them. (I haven't because I could not reconcile getting rid of reusable bags if the entire point was to save waste). The canvas bags I purchased are not as big as the grocery bags I am currently using so I am not sure if they will do the trick for grocery shopping but I think they will make fantastic farmer's market bags, or just "running to target to pick up a few things" kind of bags.
To decide what botanicals I wanted to use I simply went into my front yard and snipped the most interesting branches from my plants. The red, yellow and orange bag is made from a branch from my rose bush. The green bag is made from a branch of my peonies and the purple bag is a branch snipped from my sage bush. I then took the branches in and pressed them for a day in a phone book. The next day they were perfectly flat and ready to use. Ms. Stewart's method of painting the branch then rubbing the brayer over it to transfer the image worked perfectly I must say. The activity was fun and simple and something one could do with a child and in an afternoon. I am looking forward to using my bags and have to say I am very pleased with the way they turned out.
The only complaint I have about this project is the cost. Fabric paint is expensive ($5 a bottle) and unless you plan on using it again, it is hard to spend that kind of money to get the different colors you want. I only used a tiny portion of the bottles and now have what seems like a life time supply of fabric paint that I will probably not use up.
To decide what botanicals I wanted to use I simply went into my front yard and snipped the most interesting branches from my plants. The red, yellow and orange bag is made from a branch from my rose bush. The green bag is made from a branch of my peonies and the purple bag is a branch snipped from my sage bush. I then took the branches in and pressed them for a day in a phone book. The next day they were perfectly flat and ready to use. Ms. Stewart's method of painting the branch then rubbing the brayer over it to transfer the image worked perfectly I must say. The activity was fun and simple and something one could do with a child and in an afternoon. I am looking forward to using my bags and have to say I am very pleased with the way they turned out.
The only complaint I have about this project is the cost. Fabric paint is expensive ($5 a bottle) and unless you plan on using it again, it is hard to spend that kind of money to get the different colors you want. I only used a tiny portion of the bottles and now have what seems like a life time supply of fabric paint that I will probably not use up.
PROJECT 6: Botanical Printing
Wednesday, September 1, 2010
PROJECT 5: Botanical Pressing
I have to say the delicacy and beauty of pressing flowers is really quite enchanting. I felt like I was capturing the flowers at its most colorful moment and in essence, keeping it alive forever. I remember as a child my mother loved to press flowers and while I thought it was nice I never really quite appreciated it. Now I can see why she loved to do it. Making art out of these pressed flowers is absolutely lovely.
To press the flowers I put them between pages of a telephone book and piled more books on top of the phone book. This worked fabulously. I only pressed the flowers for three or four days, shorter than is usually recommended but my mother told me that this would be all right and that if you want the flowers to have a lot of color you should press them for a shorter period of time.
The flowers I made the cards out of are cosmos from my neighbor's yard. My four year old niece was visiting and my neighbor's daughter handed her a bouquet of cosmos over the fence. It was really quite sweet. We enjoyed them in a vase for awhile and when I saw they were starting to wilt I pressed them.
Unfortunately Ms. Stewart does not tell readers that spray adhesive can be tricky and can leave visible stains. I opted for the spray adhesive for the cards thinking since the flowers were delicate it would be a good way to adhere them to the paper without having to over handle them. I followed the spray's instructions, spraying outside and keeping about 8 to ten inches away from the paper. Even with that the spray adhesive left small dots all over the card stock. I foolishly kept using it on the other cards because I thought it would go away. It hasn't and so while the flowers are beautiful the cards are basically unusable. The spray adhesive also left a tacky feeling all over the card stock. After taking the pictures below I snipped off the ends of the stems so they were even with the ends of the card stock. I would warn everyone against using spray adhesive for this project.
I also decided to make coasters out of some other flowers I gathered from my flower garden. In the book Ms. Stewart uses glass coasters but since I had some old tile in my shed I decided to be resourceful and just use those. I spoke with my mother and she told me just to mix some Elmer's glue with water and paint it over the flowers and coasters with a paint brush. This worked great.
So for this particular project I think I just should have asked my mother for help instead of relying on the instructions of Ms. Stewart. I learned that lesson the hard way with the spray adhesive.
To press the flowers I put them between pages of a telephone book and piled more books on top of the phone book. This worked fabulously. I only pressed the flowers for three or four days, shorter than is usually recommended but my mother told me that this would be all right and that if you want the flowers to have a lot of color you should press them for a shorter period of time.
The flowers I made the cards out of are cosmos from my neighbor's yard. My four year old niece was visiting and my neighbor's daughter handed her a bouquet of cosmos over the fence. It was really quite sweet. We enjoyed them in a vase for awhile and when I saw they were starting to wilt I pressed them.
Unfortunately Ms. Stewart does not tell readers that spray adhesive can be tricky and can leave visible stains. I opted for the spray adhesive for the cards thinking since the flowers were delicate it would be a good way to adhere them to the paper without having to over handle them. I followed the spray's instructions, spraying outside and keeping about 8 to ten inches away from the paper. Even with that the spray adhesive left small dots all over the card stock. I foolishly kept using it on the other cards because I thought it would go away. It hasn't and so while the flowers are beautiful the cards are basically unusable. The spray adhesive also left a tacky feeling all over the card stock. After taking the pictures below I snipped off the ends of the stems so they were even with the ends of the card stock. I would warn everyone against using spray adhesive for this project.
I also decided to make coasters out of some other flowers I gathered from my flower garden. In the book Ms. Stewart uses glass coasters but since I had some old tile in my shed I decided to be resourceful and just use those. I spoke with my mother and she told me just to mix some Elmer's glue with water and paint it over the flowers and coasters with a paint brush. This worked great.
So for this particular project I think I just should have asked my mother for help instead of relying on the instructions of Ms. Stewart. I learned that lesson the hard way with the spray adhesive.
PROJECT 5: Botanical Pressing
Sunday, August 22, 2010
PROJECT 4: Block Printing
It pleases me that I am finally updating my blog as I know it has been awhile since my last post. I have many reasons for my delay. The first is that block printing material is hard to find. First I stopped at my trusty neighborhood Hobby Lobby but they did not have the material I needed. Then I went to Boulder's finest hardware store/art store and while they did have a few block printing items they did not have exactly what I needed. I was finally forced to order the materials off line from Dick Blick but then of course needed to wait for them to arrive. Then when everything finally arrived I was too busy with work and then I had some lovely out of town visitors that I devoted all of my attention to.
The funny thing about this all? Block printing is the project I have most been looking forward to. It has always been a dream of mine to have my own stationary line. I walk into a stationary store and am overwhelmed. I love the feel and smell of all the different paper. I spent hours picking out my wedding invitations and still pull them out sometimes to remember just how lovely they are. I have made many cards before using different techniques but never block printing so naturally I was excited to try it out.
The first thing I realized is that I absolutely love the process. Cutting the thin strips of rubber off the block is very satisfying. I also realized that it is very difficult to pick a design that will transfer well to block printing. Because detail is something that does not lend itself to block printing it may not be clear that something will not work out once ink is applied and it is transferred to card stock. For instance, I tried making a buddha design in one of the blocks but it did not transfer well so I tossed that idea. The turtle and flower set below were fun to make but I was not extremely pleased with the outcome. My favorite is the lotus flower set below. I think the simplicity of the flower without any writing makes these cards sophisticated but the color makes them fun at the same time.
This is definitely an art that I will continue to practice and hopefully one day will master so that I can add block printing sets to my stationary line!
Tip: If you are a beginner don't use linoleum blocks, they are very hard to cut, My mom told me this and she is an art teacher so I followed her advice and used rubber blocks instead. They were very easy to cut from and I didn't have any trouble.
The funny thing about this all? Block printing is the project I have most been looking forward to. It has always been a dream of mine to have my own stationary line. I walk into a stationary store and am overwhelmed. I love the feel and smell of all the different paper. I spent hours picking out my wedding invitations and still pull them out sometimes to remember just how lovely they are. I have made many cards before using different techniques but never block printing so naturally I was excited to try it out.
The first thing I realized is that I absolutely love the process. Cutting the thin strips of rubber off the block is very satisfying. I also realized that it is very difficult to pick a design that will transfer well to block printing. Because detail is something that does not lend itself to block printing it may not be clear that something will not work out once ink is applied and it is transferred to card stock. For instance, I tried making a buddha design in one of the blocks but it did not transfer well so I tossed that idea. The turtle and flower set below were fun to make but I was not extremely pleased with the outcome. My favorite is the lotus flower set below. I think the simplicity of the flower without any writing makes these cards sophisticated but the color makes them fun at the same time.
This is definitely an art that I will continue to practice and hopefully one day will master so that I can add block printing sets to my stationary line!
Tip: If you are a beginner don't use linoleum blocks, they are very hard to cut, My mom told me this and she is an art teacher so I followed her advice and used rubber blocks instead. They were very easy to cut from and I didn't have any trouble.
Labels:
block printing,
flower,
lotus,
stationary,
turtle
Block Printing
Subscribe to:
Posts (Atom)